The following article will help you setup your Host Orlando email account with your BlackBerry using the BlackBerry Internet Service (BIS) technology. BIS comes standard on every BlackBerry and is provided free of charge by your provider. Let’s take a look at the article below to get you setup:
Note: The setup process may vary depending on your wireless provider. You may need to consult the help documentation provided by your carrier.
- On your PC or MAC, open your browser and navigate to your provider’s BlackBerry Internet Service website from the major carriers below:
- Alltel: http://www.alltel.blackberry.com/
- AT&T / Cingular: http://bis.na.blackberry.com/html?brand=mycingular
- Nextel / Sprint: https://bis.na.blackberry.com/html?brand=nextel
- Rogers: https://bis.na.blackberry.com/html?brand=rogers
- Telus: https://bis.na.blackberry.com/html?brand=telus
- T-Mobile (U.K): http://www.instantemail.t-mobile.co.uk/
- T-Mobile (U.S): https://my.t-mobile.com/Login/Default.aspx
- Verizon https://bis.na.blackberry.com/html?brand=vzw
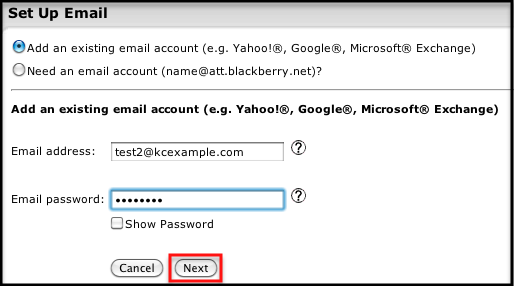
- Next, sign in with your Rackspace Email address and password and select Next.
- When you sign in, your account will then begin the verification process.
- User Name – Enter your entire email address, using all lowercase letters (e.g., myname@mydomain.com).
- Password – Enter the password associated with your email account.
- Email server – Enter the secure server name: secure.emailsrvr.com
- After your account has been confirmed, you should receive a “Email Account Successfully Added” notification. Logout and your email should start populating into your phone after a few minutes.
Note: If you do not see your carrier below, please contact them.

Note: some provides may ask you to provide additional settings, if so please see below:
