The following article will get your Host Orlando email account setup on your iPhone using an IMAP connection. An IMAP connection allows you to access and manage your email directly from Host Orlando servers. Any changes made on your device will be replicated on the server. Let’s take a look at how tp set this up:
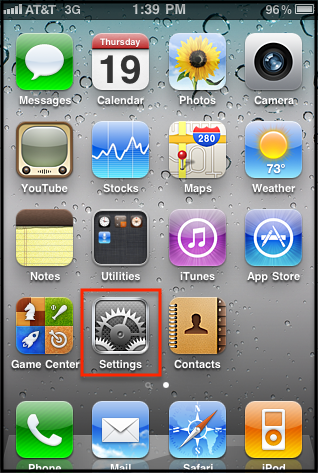
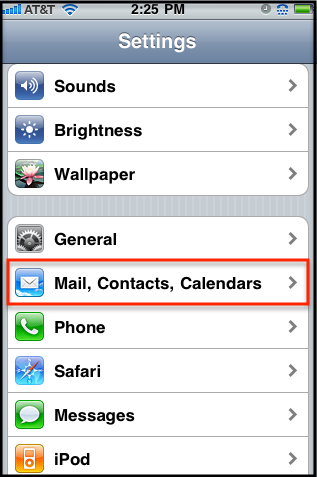
- From the home screen on your device tap Settings, and then Mail, Contacts, Calendars.
- You’ll then tap Add Account, Tap Other and then Add Mail Account.
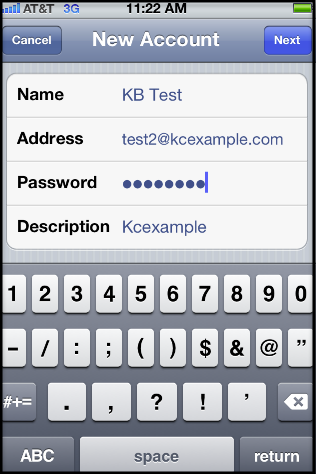
- The “New Account” screen will appear and you’ll then Enter in the following information in the fields provided, and then tap the Save button.
- Name – Enter in your first and last name. This is the name that will appear in the From field of messages you send
- Address – Enter your entire email address (e.g., myname@mydomain.com).
- Password – Enter the password for your email account.
- Description – Enter a descriptive name for the account (e.g. Work Account). This description will only be visible to you.
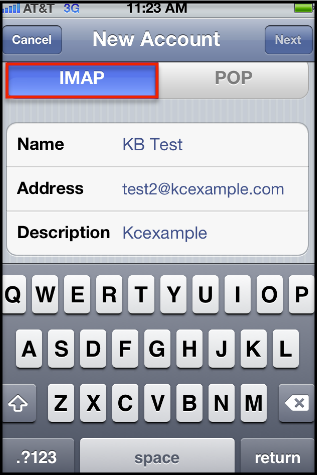
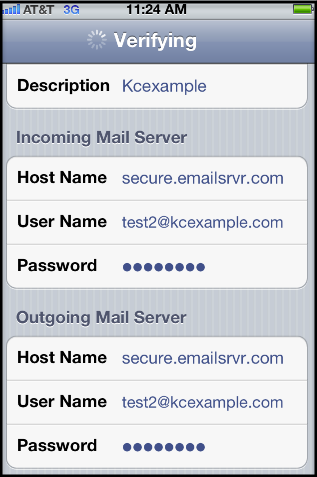
- After your account has been looked up, you’ll then select IMAP located at the top and then enter in both the Incoming Mail Server and Outgoing Mail Server fields with the following information:
- Host Name – Enter in the secure server name: secure.emailsrvr.com
- User Name – Enter in your entire email address (e.g., myname@mydomain.com).
- Password – Enter in the password for your email account.
- After you’ve entered in all the information, tap Save and the device will then verify your settings. After you’ve been verified, you’ll then be take to the Mail & Notes screen.
Mapping Your Folders
Mapping your folders allows you to synchronize email across all your devices, email clients and the web. By default, some email clients and mobile devices create their own folders for Sent, Trash, Spam etc. You can map your sent, deleted, and spam messages to their proper folders as will as access any sub-folders you’ve created by following the procedure below:
- After you’ve set up your mail account, go back to your home screen and Tap your Mail icon.
- Select your newly created Mailbox and let all your mail synchronize and then go back to your home screen.
- From the home screen tap Settings, Mail, Contacts, Calendars, select your Account, and then select your Account one more time.
- You’ll then tap Advanced located at the bottom, tap Drafts and on the next screen, select Drafts under the Server option.
Note: Repeat step number 4 for your Sent and Trash folders.
Note: You’ll see that all your sub-folders have populated under the Server option.
